
This is the manual that comes with version 3 of the Rolling Mavericks Enduro Trail Jack Stand.
by David Lemereis
Safety warning
Use this tool at your own risk
Raising one of your wheels off the ground with the Trail Jack makes the motorcycle unstable and should only be used in an emergency.
Use this Trail Jack only for emergency maintenance while on the trail, when there are no other safer, more stable means to lift one of your wheels off the ground.
The Trail Jack is not intended for daily use in your garage or workshop.
Only use on firm, stable, flat surfaces.
Do not use the Trail Jack on soft surfaces, as it could sink into the ground, causing the motorcycle to fall on top of you.
Enduro Trail Jack Assembly
Before assembly, ensure the O-rings are clean and clear of sand, mud, or other debris. The parts with O-rings fit tightly, and any debris may make it impossible for the tubes to slide into each other.
To assemble, push the retainer with the two O-rings through the foot. Push these two assembled parts into the thickest of the two tubes (base tube), in the end with no holes.
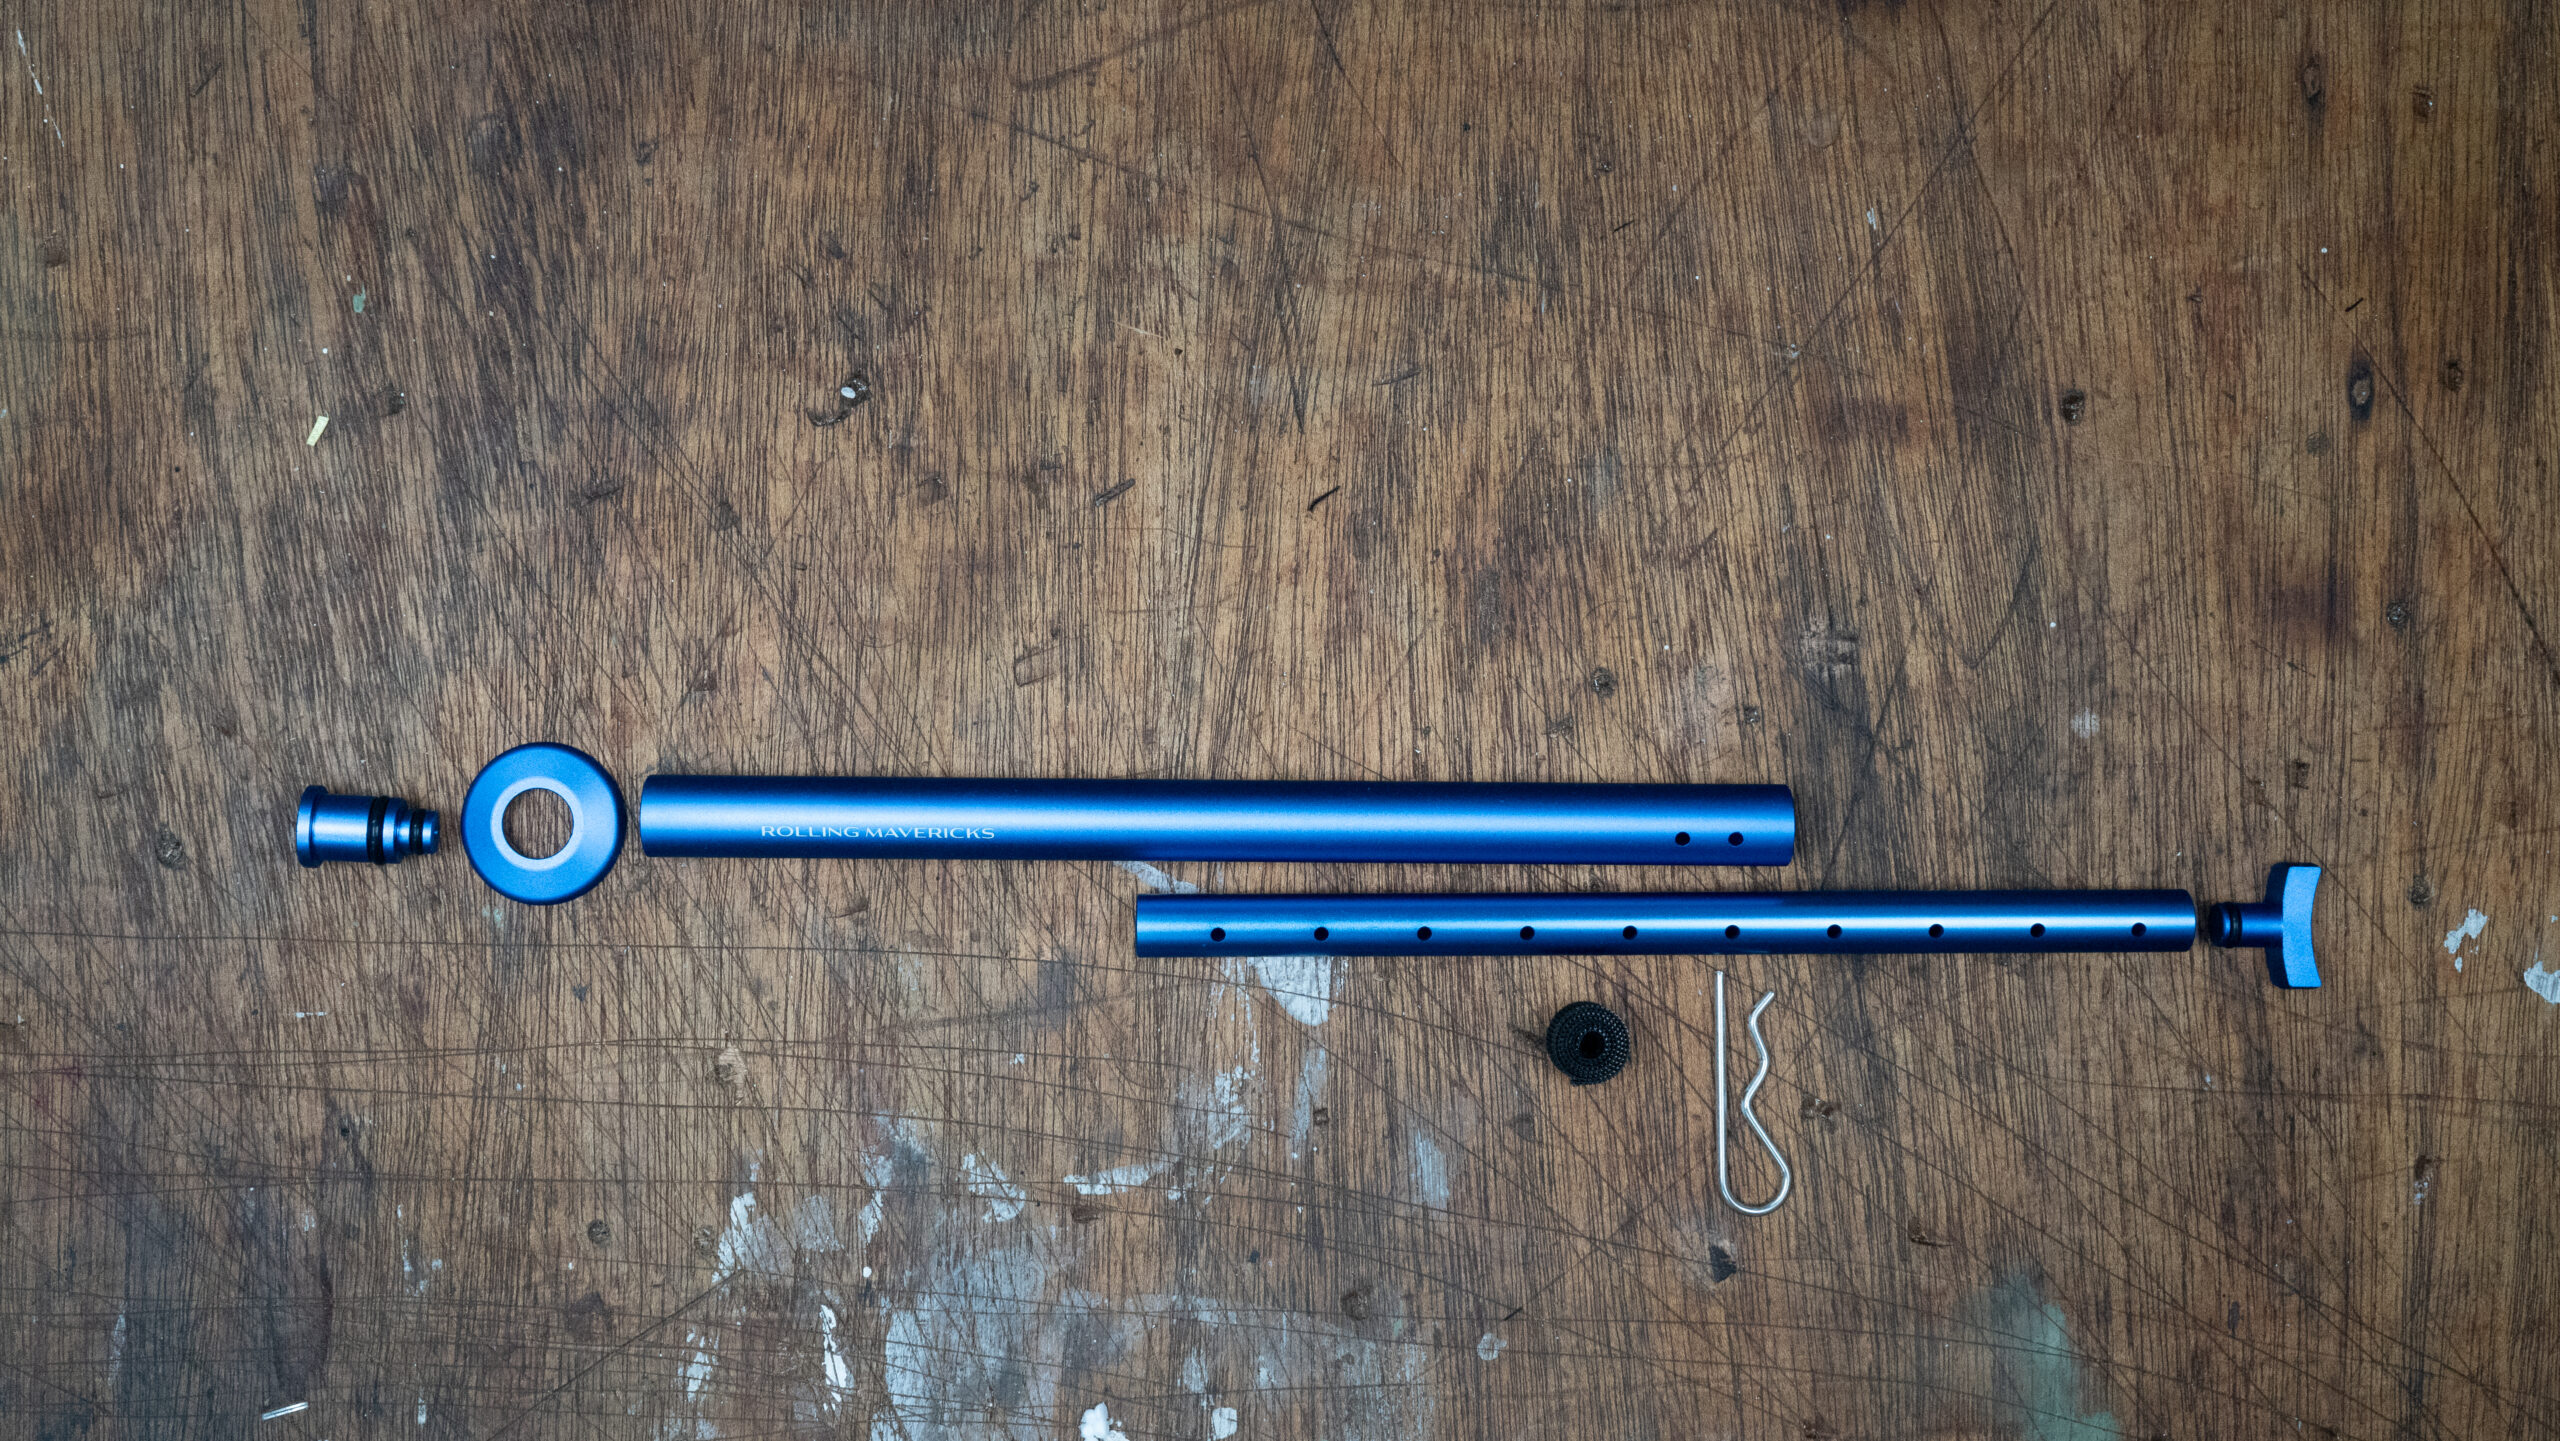
Next, push the Yoke with the O-ring into one end of the thinnest top tube and slide this top tube into the base tube. Keep the spring clip nearby as you will now prepare to lift one bike wheel off the ground.
Once done fixing your flat, disassemble in reverse order and pack the Trail Jack in your toolroll.
Preparations before lifting a wheel off the ground
Find a firm, stable, flat, surface and park your motorcycle on its side stand. If you are removing a wheel, loosen the axle nut before jacking the bike up.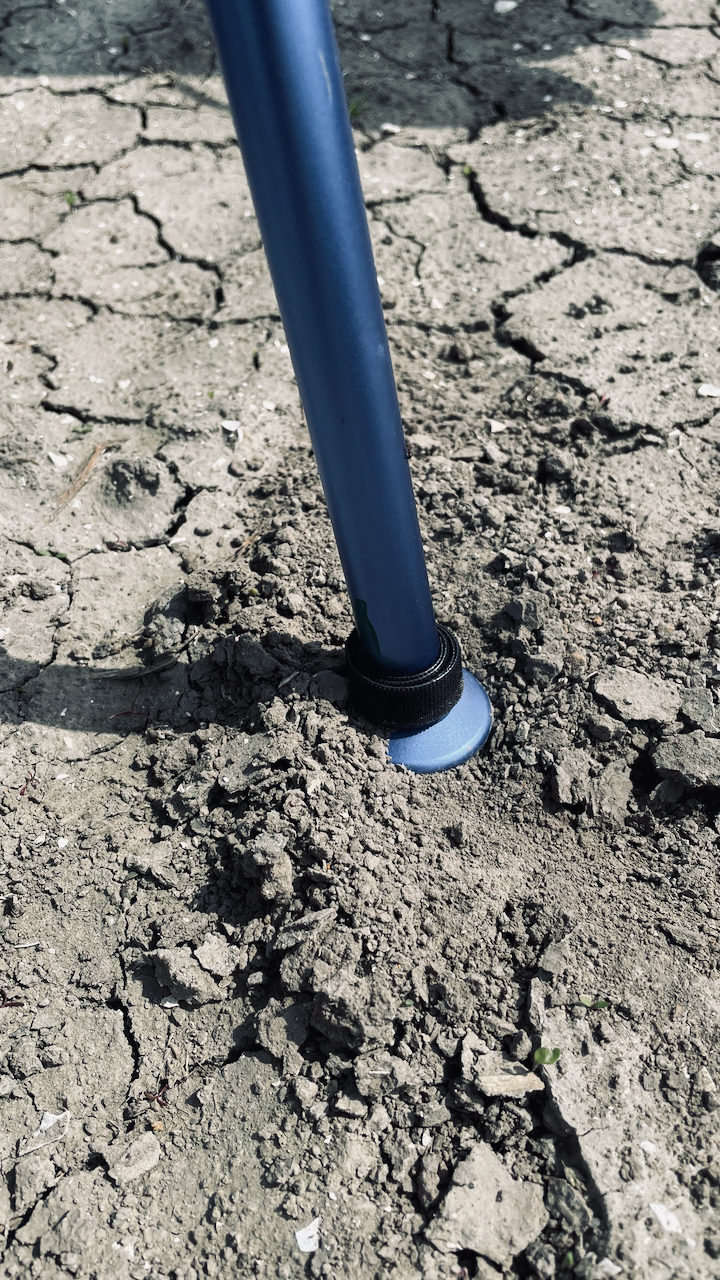
Front-wheel in the air?
 Put your motorcycle in first gear to lock the rear wheel to prevent it from rolling.
Rear-wheel in the air?
Use the supplied double-sided Velcro strap to lock the front brake lever in place, preventing the front wheel from rolling. 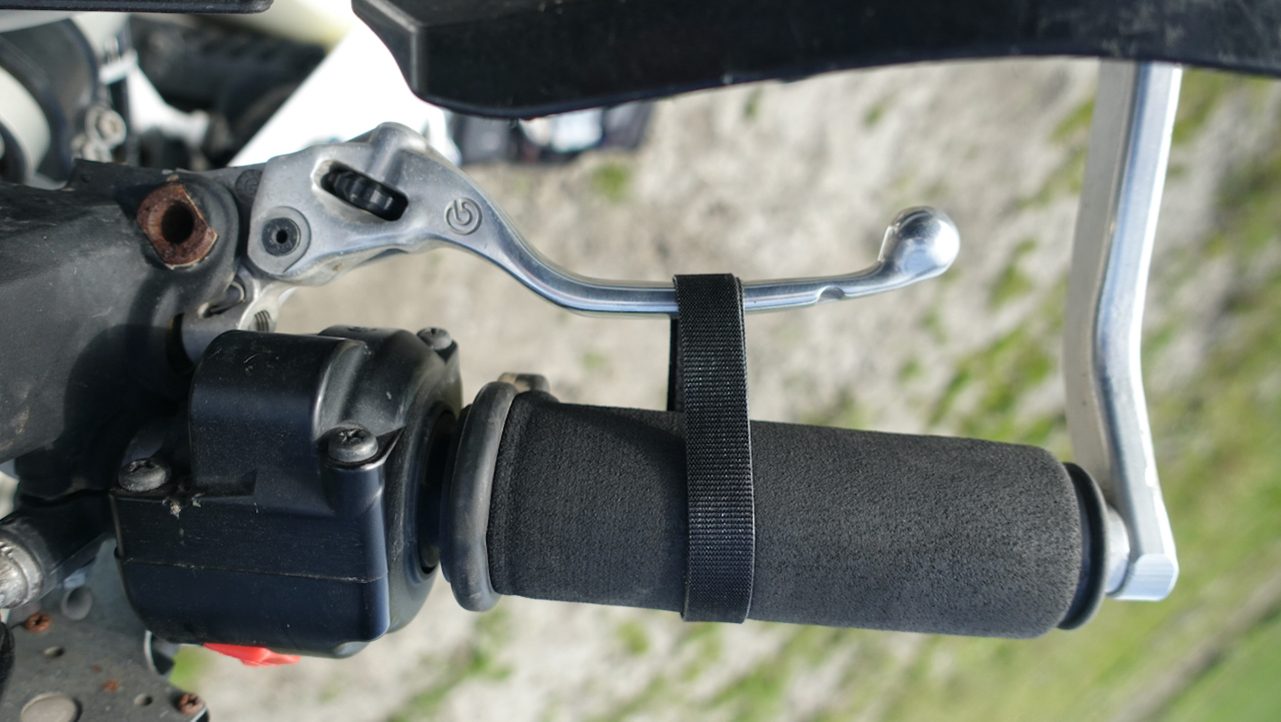 Add stones, logs, heaps of sand, or other solid objects behind and in front of the wheel on the ground for extra safety.
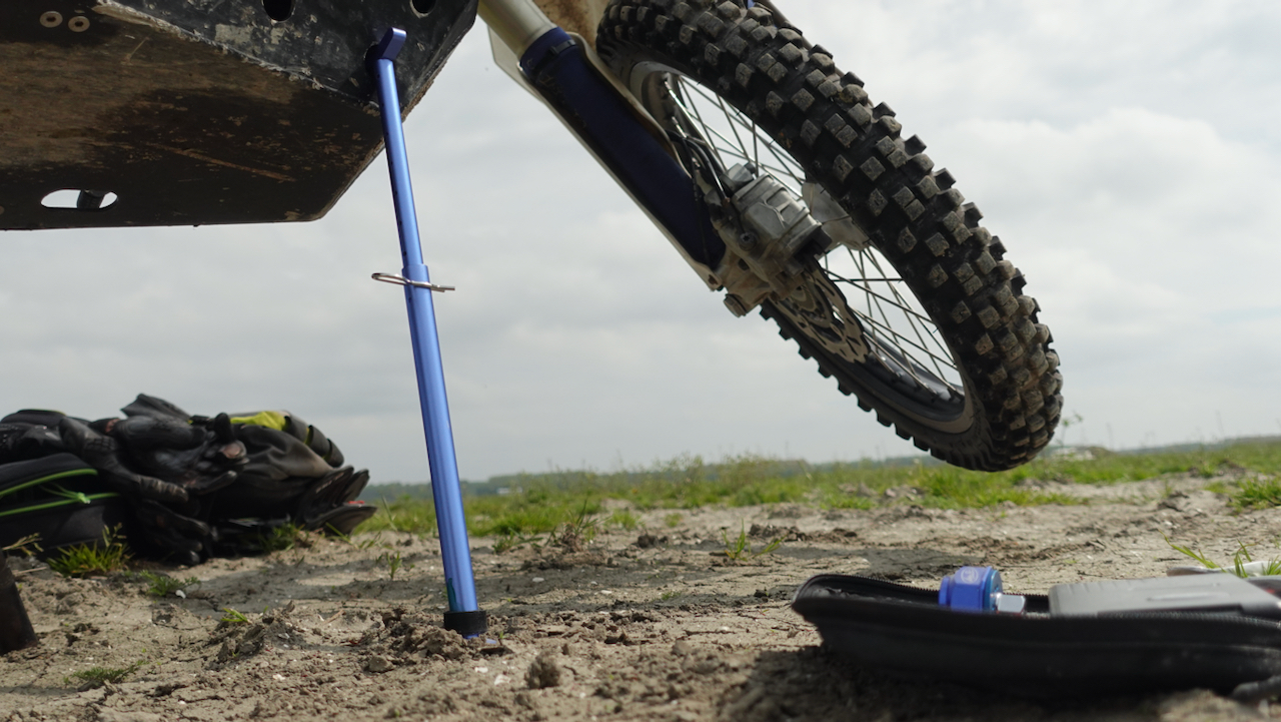
Find a Jacking Point on the Bike
You now need to find a good, solid jacking point on the bike to lift the wheel. For example, to lift the rear wheel, the rear swingarm may be best. To raise the front wheel, find a spot near the front of the engine.
 A frame tube or a hole in the bash plate that fits the Yoke is a good spot. Please make sure that whichever place you choose, it is safe and secure.
Do not use foot pegs as a jack point unless you are sure yours are fixed and not hinged like most foot pegs. You run the risk of the motorcycle falling over unexpectedly because the foot peg may suddenly fold, and the Yoke loses grip on the jack point.
Raising the Motorcycle
When the motorbike is on its side-stand it leans to one side. To raise the bike up with the Trail Jack, you should position yourself on the other side of the bike. Again, make sure the surface can support the Trail Jack. If not, take measures to prevent the foot of the Trail Jack from sinking into the ground.
Note: It would help if you tried this at home before you leave on a trip. You may have to drill a hole in the bash plate to accommodate the Yoke.
Here’s a video where I demonstrate how to use the trail stand
https://youtu.be/GkQhNBUNl6w
Naturally I’m biased but according to the many reviews in the Rolling Mavericks shop The Rolling Mavericks Ultralight Enduro Trail Jack Stand is considered the lightest and best trail jack stand on the market. In the shop you will find many other tools designed specifically for motorcycle adventure and enduro riders.